The Wiki for Tale 6 is in read-only mode and is available for archival and reference purposes only. Please visit the current Tale 11 Wiki in the meantime.
If you have any issues with this Wiki, please post in #wiki-editing on Discord or contact Brad in-game.
User:Obol/FountainGuide
Dancing Waters Guide
I will attempt to explain how to configure a moderately complex fountain design since the interface is not very intuitive. The resouces needed to build the components can be found on the Test of Dancing Waters wiki page.
Start by building the Mechanism. It is built in a small construction site, but do not add any material to it until you make the 3 output gearbox. I suggest you look for a gearbox requirement that has two ranges that overlap, that way you can use two of the same outputs, however, to make it even easier do not use one where the different range is in the middle. You can tear down the construction site and get the material back and try again as many times as you need, each time you will get a different gearbox requirement. The construction site will last two hours and if you need more time you can add just 1 debin of 1 item to reset the timer. Do NOT build the mechanism too close to another fountain.
I will not include the building of the basins, that is the easy part, however once the basins are built they can be moved by clicking on them and using the "Slide" option. I suggest you use the F8F8 camera and try to get them about the same distance apart. Try to keep the basins close to your mechanism.
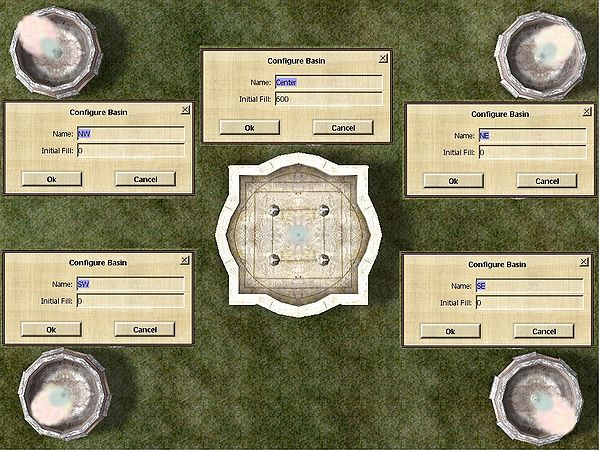
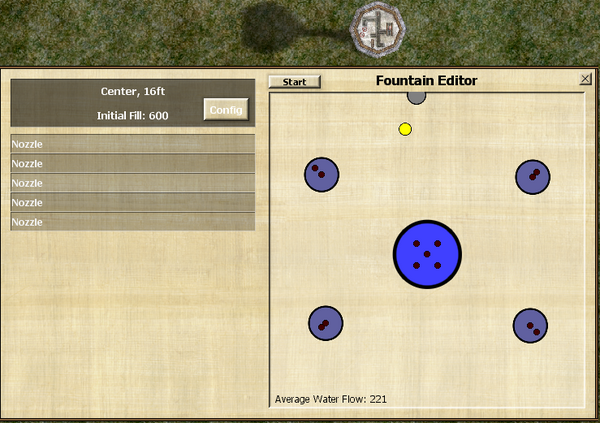
Notice the images below; on the left illustrates the 5 basins and their configuration screens and on the right is the main interface for the fountain design.
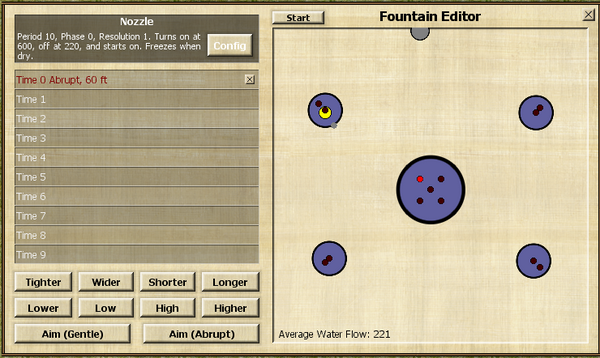
The interface is accessed by clicking on the mechanism and using the Adjust the Fountain option. On the interface the grey dot is the mechanism, the yellow dot is you and the larger circles are the basins. The small dots in the basins are nozzles. You can access the basin's configuration screens by clicking on a basin and hitting the Config button. Notice I only put water in one basin, the middle one. Also notice I named the basins so I can keep track of them since the screen will rotate when I move around. With this design I plan to send water from the middle basin to the 4 outer basins, then send the water back to the middle basin and repeat, creating a cycle affect. To add water to the basin you will need jugs of water in your inventory, the more water you put in the basin the longer the cycle will take because it will take longer to move that amount of water. To be honest, I used too much water in the middle basin, but I wanted a long cycle, however most people won't set there and watch the full cycle when it takes this long. 50 water will make for a fast cycle.
 |

|
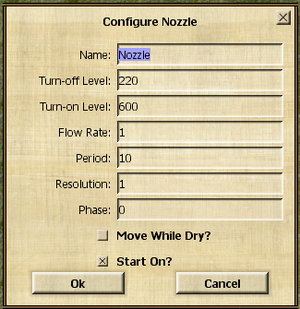
How do we sent that water to the other basins? We use nozzles of course. On the Test of Dancing Waters link you will find all of the nozzles available, If you sort that table by the flow rates, from lowest to highest, use only the nozzles with the lower rates. I suggest you stay away from the Dirty Rain nozzle because it has an extremely high flow rate and it will cause too much stress. Using the lower rate nozzles you will be able to use more nozzles and stay below the maximum stress level.
While putting the nozzles in the basins, I moved them before I hit the build button so they all were not on top of each other. On the Interface image above you can see there are 5 nozzles in the middle basin, 4 White Showers moved to the sides and 1 Misty Bubbles in the center. The outer basins contain 2 nozzles in each, a Misty Bubbles in the center and a Crystal Fog moved to the side.
 |

|