The Wiki for Tale 4 is in read-only mode and is available for archival and reference purposes only. Please visit the current Tale 11 Wiki in the meantime.
If you have any issues with this Wiki, please post in #wiki-editing on Discord or contact Brad in-game.
Test of the Safari/Bastet
| Main Shard | Bastet | T5 Beta |
| Discipline | ||
|---|---|---|
| Requirements | ||
| ||
| Principles | ||
| ||
| Demonstrated by in [[]] on by fulfilling the requested requirements. | ||
The Test of the Safari
Description
According to the official in-game information from the University of Body:
In the Test of the Safari you will learn to track and capture seven species of Egyptian fauna. Each species has unique behaviors and tracking methods, and each must be accomplished four times. More information about each species can be found here.
Complete the test
Capture/tap 4 of each kind of Egypt's animals (listed below).
Keeping track of progress
To review which animals you have captured/tagged:
- click on yourself (or press Esc)
- select Tests menu
- select Test of the Safari
- select Read my Log Book
A popup will appear, stating your finds and captures, and how many remain.
Strength bonus
You will get a +1 permanent strength bonus for every 4 animals that you capture/tap/find (maximum 4 per type). So if you find 2 falcons and 2 fennecs, you should get a strength bonus. There are 7 animals, times 4, meaning that you can get a maximum bonus of +7 in this way. Strength bonus increases the ability to carry 500 more weight (not bulk) per 1 bonus point.
Further reading
Info from previous tales:
The animals of Egypt
Bullfrogs
Also see the discussion page for an alternate method that does not require being able to tell the direction of the frog or the relative loudness of different sounds spaced over a minute apart.
Official game info from University of Body:
Bullfrogs exhibit almost perfect camouflage, but their distinctive sound gives them away. High Dexterity helps capture these creatures.(It's actually Endurance that is needed to capture bullfrogs. -Rosie)
- Bullfrogs only appear between 6pm through 6am (evening/night, Egyptian time).
- Bullfrogs always live on the edge of water. This can be any type of water, like a pond, a lake, a river or a sea shore.
- To search for bullfrogs more effectively, try searching near a sea shore instead of river bank or small lake/pond. If you search at a river bank, consider the possibility that the bullfrog could be on the other side of the river. In both cases be aware that bullfrogs might be located on small islands in the river or off the coast that are within the hearing range but outside of your reach (even with a Ferry Boat).
- It helps to use stereo audio equipment (stereo headset/speakers) to pinpoint where the sound comes from (left/right) and determine the loudness of the sound better. The direction of the sound is based on your CAMERA position, not your character position.
- There are a number of different sounds, but they usually lead to the same bullfrog. Sounds usually play at least once per minute, sometimes more frequent.
- Go to the exact location where the sound is loudest and where a specific direction cannot be distinguished. You should be on top of the location of the bullfrog.
- Click on yourself (or press Esc key), go to Tests menu, select Test of the Safari, and click on "Capture a bullfrog."
- When the bullfrog is not captured, move around 1 or 2 coordinates and try again.
- Failing to catch a bullfrog uses the endurance timer. There is no timer if you are successful in a capture attempt.
Desert Rats
Official game info from University of Body:
Fast-moving Desert Rats blend perfectly with Egypt's terrain, but their distinctive tracks will lead to them every time. Be aware that the wind will cover up tracks over time.
footprints

footprints F7 default view


- It seems they are viewable at the default F7 camera; a little more visible than last tale.
You need 1 Canvas and 4 Boards to set up a Desert Rat Trap. Set the trap under Projects > Tests. These are not normal buildings: they don't appear on the ground and they don't last more than an instant. Either they catch the rat immediately, or they don't. The materials are NOT consumed if you fail to catch the rat.
Materials are ONLY consumed when you catch the rat. You can try as often as you want with the materials for one cage. It will give a short End timer. - Taemon
To catch a rat in your trap, you first need to follow the tracks in the direction of travel. Look closely at a track and you'll see rough toe prints on one end of the track. Using a very close-up single F8 camera view and lowering your texture resolution (click yourself/Utility/Options: Video) can be very helpful in seeing the details of the tracks. Once you know which way the rat is traveling, continue to follow the tracks until they end. There can be fairly large gaps between tracks, so scan a good-sized area for further tracks. Once you think you've found the forward-most track, set your trap in front of it. If that was the most recently made track, you should catch a rat. If you don't catch one, scan further ahead for more tracks while your END timer runs down.
Also, rats can double back and go in circles. The toe prints can help you understand the path of travel when tracks criss-cross or do other confusing things. -- Ankh-EnDa
Rats can be found on grass as well as sand. To help see their tracks on sand, turn down time of day lighting and turn up shadows.
IMPORTANT NOTE: You can ONLY see the tracks if you have shadows ON. Check your settings by clicking on yourself (or press Esc), then to Options, then to Video. Set it at to at least the 2nd tick to see the tracks!
Tips for Catching that Rat:
- Rat tracks are spaced in proportion to their age, the older the tracks, the further apart they will be.
- Rat tracks do not immediate disappear once the rat is caught. The tracks stay and fade out in accordance with the same schedule as for above
- If you are following an active set of tracks, the next set of prints will show up within a few seconds in front of the last set.
- Rats are known to be suicidal. They have been observed to jump off the cliffs at the edge of the world, drown themselves in bodies of water.
- Rats despawn and move on by themselves, they do not wait around to be caught. Their tracks also won't immediately go away
Build the trap using your menu: Projects | Tests | Tests of the Safari | Set up a Desert Rat Trap. It helps to pin the menu when you start tracking.
The rats can climb up 90 degree cliffs, catch them fast if they are near one.
Fennec
Official game info from University of Body:
Build a Fennec trap using boards and rope. Each night, traps on the outskirts of a pack will show signs of the creatures, and traps within 250 coordinates will capture one. At least four different subspecies of Fennecs must be captured and released.
- Building a Fennec trap takes 4 Boards and 1 Rope and can only be build on sandy soil (when sand icon is shown).
- Checking your traps once per Egyptian day should be sufficient, since the status might only change once per day, at 4:00am.
- There are at least 6 kinds of Fennecs. One each of 4 different sub-species must be captured. Sub-species include:
- Pygmy
- Short-haired
- Sharp-toothed
- Ruddy
- Bushy-tailed
- Furry
- Brown
- There are 3 possible messages:
- "The Trap is perfectly clean, not even a Fennec hair to be seen.", which means that there are no fennecs near. Or the trap has been checked earlier that day and had a fennec in it!
- "Although the trap doesn't contain a live animal, you definitely see signs of Furry Fennecs!", which means that a fennec should be within 250 to 600 coordinates. Build more traps within that range (outside the 250 coords circle). {note the outer most limit of "you see signs of Furry Fennecs!" will be 1000 coords from the center point. you will get the "not even a Fennec hair to be seen" sign beyond 1000}
- "You have captured a Furry Fennec! You let the little fellow go to rejoin his pack.", which means that you will have captured a fennec of a specific subspecies, as indicated.
- After you have captured all 4 subspecies of fennecs, it is a good custom to make your trap usable by anyone, to help others find good locations for capturing fennecs. Announcing locations to your friends, guild chat or even public chat might be helpful. Listing them here is also a good idea.
Separate page for Fennec locations (map/table.)
Pro-tip:
- An easy way to catch fennecs is if someone announces a capture of a type you have not caught, build a trap 250 coordinates away in each cardinal direction from the announced capture point.
- This must be done before the fennecs move at 4:00am. After 4:00am, check your four traps and one will have a fennec!
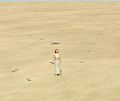
Gazelle
Official game info from University of Body:
Gazelles run faster than humans. The key to tagging a Gazelle is to tire it out. Strong teamwork is a must.
The method of tagging a gazelle described below is merely meant as a suggested way to do it. However, it has proven to be a very successful way to have as many people as possible benefit from it. If this method is used correctly, everyone in the group should have a chance to tag it. Because of this, and especially because it's very hard (if not impossible) to do this by yourself, the method described below is recommended.
- Gazelles appear randomly in Egypt. Could be anywhere, but mostly in less populated areas.
- Unless completely hyped with speed/dexterity bonuses, it's almost impossible to capture a Gazelle by yourself or even with only a few people.
- It is custom to announce a gazelle in an Egypt-wide channel like E! and form a large group. Let people come in, even if it takes half an hour.
- Everyone should position around the gazelle in a circle (like in the image above) and when the group is complete, one person should be appointed leader.
- If the circle around the gazelle is wide enough and nobody approaches the gazelle, the gazelle is almost guaranteed to just stand there.
- If the gazelle is close to an unpassable body of water (steep cliffs don't work, they can walk up there, even if 90 degrees), it is easier to enclose it. Making a double lined half-circle around it can be considered.
- On command of the leader, the group decreases the size of the circle slowly, moving in on the gazelle step by step.
- The gazelle will panic and move around. Warping a few coordinates in any direction is also possible. The gazelle is likely to escape from the circle.
- From this moment on, the group should chase the gazelle, but keep a certain distance. If the gazelle stops running, form a new circle around it and start over.
- When a gazelle has become tired, this is visible because it will let it's head hang down. Up to this moment, it's head will be upright.
- When this happens (tiring it out), it will not move until it gathers new energy to run again. This status will remain for about 10-20 seconds.
- The leader of the group signals everyone to tag. At this point, everyone can run up to the gazelle and click it. After tagging it, a popup should appear for each individual who tags it.
- As soon as you've tagged it, it is important to move away from the gazelle again. If not everyone has had the chance to tag it, this might be a way to keep it in sight and repeat the process.
- After regaining energy, the gazelle will run away again. Everyone who has not tagged it by then, should say so. If this is a reasonable large percentage of the group, try chasing it again.
Falcons
Official game info from University of Body:
To identify a Falcon Roost, drop a Rabbit. A falcon will take it sometime within the next 5 minutes (but never within the first minute), and will fly off toward the nearest roost. Trees may be checked for roosts, but doing so is exhausting!
- Searching a tree for falcon roosts triggers a 120-second endurance timer.
- You must have Fast gather from trees disabled under One-Click Options in order to search for falcon roosts.
- Dropping a rabbit isn't completely necessary to find falcons. There's always a tiny chance of finding the falcon roost in any tree (though the chance is very low).
- When you drop a rabbit, wait for a few minutes till it disappears. When that happens, read in your Main chat screen in which direction (North, South, East, West, Northeast, Southeast, Northwest, Southwest) you can look. Please bear in mind that this includes any tree in that direction along all of Egypt. The directions aren't very precise; for example North could also be leaning towards Northeast or Northwest. Use the map (F3) or compass (F4) to determine the direction to search.
- A tool to triangulate falcons can be found at http://hem.bredband.net/titgar/FalconFinder2.html
- Twice, immediately after finding a falcon, I dropped a rabbit for a falcon, watched it go one direction, dropped a second rabbit in the same place, only to see the falcon fly in a completely different direction. As a result, I conclude that FalconFinder2 is useless, also see above comment about the directions not being precise. I suggest simply dropping a rabbit, watching falcon fly off, searching 5-10 nearby trees roughly in direction indicated, then give up and drop another rabbit to reset the falcon's location. This produced falcons every 3-4 rabbits without a lot of running around. -Ikuu
- As a contrary opinion, I tracked a falcon using falcon finder across 3 regions and it was entirely accurate - it narrowed the possible region down to just one oasis using 4-5 rabbits, and the falcon was in the first tree I tried. --Inkoaten 09:25, 22 April 2009 (EST)
- If there is indeed only one falcon in Egypt at a time, someone catching it will cause the direction to change as you start orienting on the new one. Falcon finder can only show you where a falcon is, not who else might be hunting it. JulianJaynes 20:36, 3 May 2009 (EST)
- Falcons no longer are limited to near 0,0. They have been found as far away as Adn.
- The closer you get to the falcon, the less accurate the directional information from dropping a rabbit. This is not a bug. JulianJaynes 17:38, 30 June 2009 (EST)
- I tracked 2 falcons simultaneously via chariot hops. There are at least two in Egypt, though they may not always appear at the same time. --Wrongskian
Ibis
Official game info from University of Body:
Only one flock of Ibis inhabits Egypt. Tagging a single bird causes it to flee, but the rest of the flock is unfazed. The flock tends to move at night, and resettle in the morning.
Ibis

- The ibis flock consists of 21 birds and appears at a random spot on any shore at 6:00am. Any ibis not tagged by 6:00pm will despawn.
- It is a courtesy to announce the flock of Ibis somewhere. Whether or not you want to inform your guild brothers and sisters first, or your close friends, or straight away post their location in the E! channel, is up to you. But if you want to see some fun havoc after you've spotted the flock, announce it in E! and see some people go into panic-mode.
- When you announce a flock's location, please mention the region, its coordinates and where it is close to (e.g. schools or universities, for example).
- It is a courtesy for someone to stay with the flock, and keep announcing how many there are left.
- It is a courtesy for people on their way to the flock to announce that fact. Others coming from far can then estimate if there would be any left on their arrival, thus making a decision to go or not.
- It is considered poor sportsmanship to build obstructions to prevent an ibis from being visible, e.g. a mine or quarry. Likewise, ibis should not be "reserved"-- they are strictly first come, first serve.
- You may only capture one ibis per Egyptian day. In practice, this seems to mean one ibis per 24 Egyptian hours rather than one ibis per spawn. You cannot tag two ibis within 24 Egyptian hours, even if the two ibis are in different spawns.
Otters
Official game info from University of Body:
Otters build an underground network of tunnels. It is possible to put a board down to block a portion of the network, but if too many holes are blocked, the otter will get annoyed and eat a board!

Note: From what I gather, all, but one, of the 12 holes have 4 escape routes. It is impossible to capture an otter from a hole with 4 escape routes. Your job is to find the hole that only has 3 escape routes and use the 3 boards to block those holes. As soon as you see a hole has 4 escape routes, then thats a good candidate to put a board in. ~ Cegaiel
Note #2: Some holes have 5 exits so don't assume all just have 4 options ~ Dianess
- Each otter has 12 holes that it can escape to, and mock you from.
- Try catching the otter and map which holes it escapes to. Using your 3 boards to force it to specific holes, eventually you will find one hole with only 3 exits in which you should put your boards.
- While out and bout to trap otters carry a avg of 20 boards on you. It appears this tale the otters are fixed...not like last tale. This tale you must trap them between 3 holes now. Easy way to do this is to map out the hole locations, if more than 3 boards are placed wrong the otter will eat the boards.
- Note - Otters seem to put up with a variable number of boards ... a guildmate had one eaten when he placed more than 3 boards, I've had one eaten on more than 4 (eaten when a 5th was placed) and my wife had one eaten a board on the placement of the 10th board. - Tahrqa
- I caught one after placing 7 boards, with none eaten. Probably just lucky, though. --Shebi 20:44, 11 February 2009 (EST)
- Also Note: Once caught the holes (and any boards in them) disappear.
- Sometimes an otter's holes can be hidden by objects like mines, quarries, and warehouses.
- Otters can be found in grassland or desert: in that case, their holes look like silt (but brownish), or a round version of a flimsy brick rack, if you will.
- Otters can be "tag-teamed," meaning that two people may put three boards each into otter holes. However, the otter will still escape if boards are not blocking all exits from the hole he's in.
- One method of catching an otter: get a piece of graph paper. Run around and find and map all holes on your graph paper. Note which hole the otter is presently in and mark that hole number 1 and try to catch the otter. Find the hole that the otter went to next and mark that number 2. You now know that holes 1 and 2 are connected. Try to catch the otter again. Mark the hole that the otter escapes to number 3. You now know that holes 2 and 3 are connected. Continue in this matter until you have a pretty good idea of which holes are connected to each other. In this way you will be able to determine the otter's escape routes from each hole. Once you have figured out which hole has only three escape routes, you will be able to place your boards in the escape route holes and capture the otter. This takes TIME. It took me over an hour to map the holes and determine where to catch the otter. Best of luck to you!!
- A simple mapping method:
- Turn off your "auto pick up piles of 50 or fewer items" option.
- Pick up 78 sand.
- Drop 1 sand by the first hole you find.
- Drop 2 sand by the next hole you find.
- Continue until you've labeled each hole with a sand bucket.
- Locate the otter, click on the sand bucket to see which number hole this is, and write it down. Try to catch the otter.
- Relocate the otter, click on the sand bucket to see which number hole this is, draw an arrow from your first number and write down the second one.
- Continue with mapping and blocking as above.
- Basically, this avoids having to keep track of coords, where holes are in relation to each other, etc. You always know which hole it is immediately just by checking the bucket.
- Another otter catching method. This should only use 3-4 boards and take about 5 minutes if you know generally where all of the holes are. - Engine
- Move to the first hole that has an otter and try to catch it; place a board in this hole,
- Find the hole the otter has moved to and mark it with a piece of grass. This will be the hole you want it finish up in,
- Click on the otter and move to the new hole,
- If the otter moves back to the hole marked with grass, put a board in the hole it just came from and click on the otter again,
- Repeat the last two steps until you've caught the otter