The Wiki for Tale 5 is in read-only mode and is available for archival and reference purposes only. Please visit the current Tale 11 Wiki in the meantime.
If you have any issues with this Wiki, please post in #wiki-editing on Discord or contact Brad in-game.
User:Jonus/HatchetGuide
7-8k Hatchet Guide by Jonus
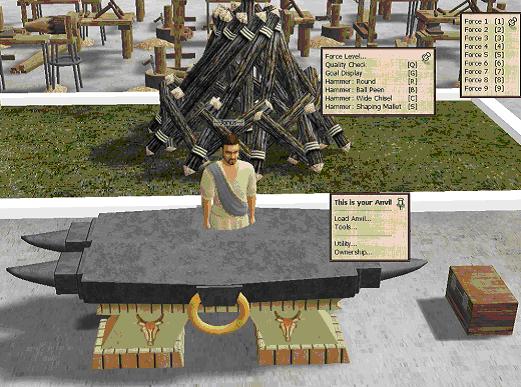
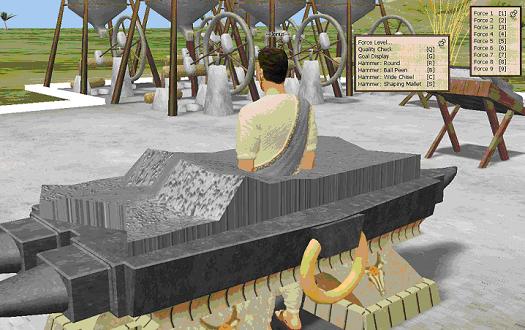
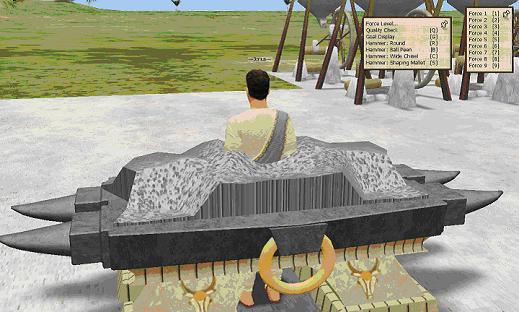
Let's start by getting setup at the anvil. I like to stand in the middle of the anvil, maybe slightly towards the back. That way I can see the whole front and both sides of the piece I am working on at equal distances. You can move around as you work too and it is often necessary. Use the F5 view so you can zoom in close on objects and look at them from above when you zoom out.
Now that you are positioned, click on the anvil to bring up the menu. Click on Tools... to bring up that menu and pin it up (with the push-pin icon) somewhere above your head. On that menu, click on Force Level... to bring up that menu and pin that one up as well.
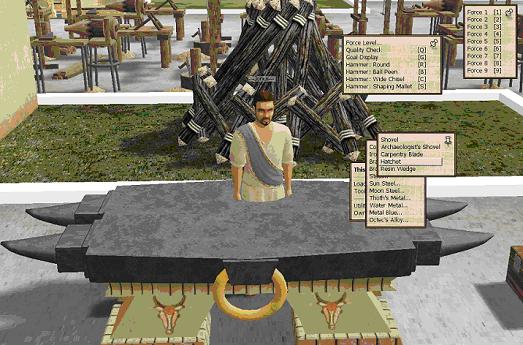
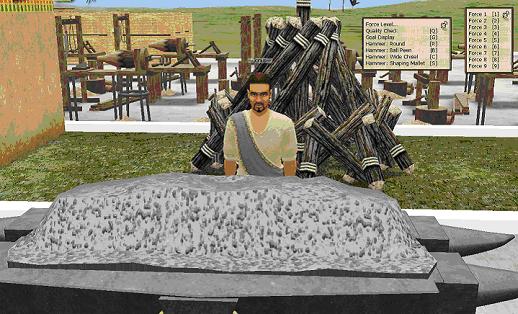
Now we need to load our project onto the anvil. For this project I used iron. Make sure you have enough of the metal you want to use on you for the project you will be working on. Click on the anvil to bring up the menu, click on Load Anvil... then click on the type of metal you are using (in this case Iron...) and finally choose the type of project, in this case Hatchet.
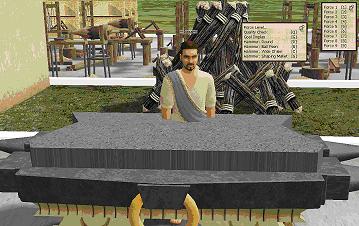
Here we see the blank hatchet form on the table. But that doesn't tell us very much about what the hatchet should look like when it is done. Luckily there is a nifty option on the Tools menu called Goal Display. Place your mouse anywhere over the blank hatchet on the table and press the "G" key to see what the goal of your work should look like when it is done. This shows you the ideal hatchet shape and our goal is to make it look as much like this as possible -- to get the highest quality hatchet possible.
|

|
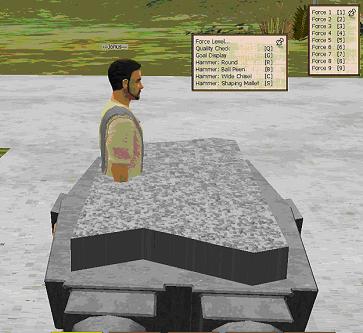
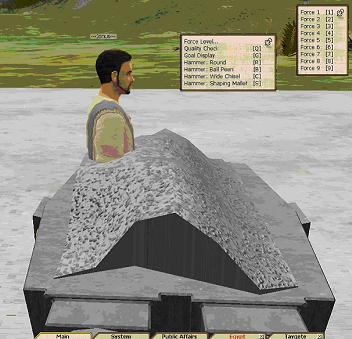
But it is not enough to see it just from the front. One of the keys to understanding what we will be doing is understanding how we need to move metal around this blank form. All of the tools will push metal to the sides when you hit the hatchet, especially when you hit it with great force. Some of the tools, notably the Shaping Mallet and the Round tool, will move more metal than the others, or a least move it in different ways. The basic Blacksmithing Guide talks about the tool shapes and how they move metal around, so I won't go into that here. For this project we will mostly be using the Shaping Mallet and Ball Peen hammer. The important point here is to look at the Goal from different angles, such as the sides and back. Place your mouse over the blank hatchet on the table and press the "G" key again to see what the Goal should look like. Notice that when looking from the side, a lot of metal needs to be moved from the front to the middle and back.
|
|
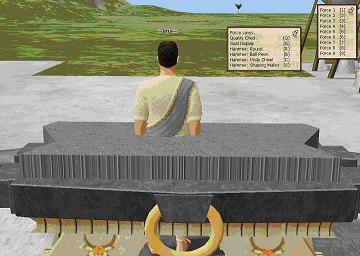
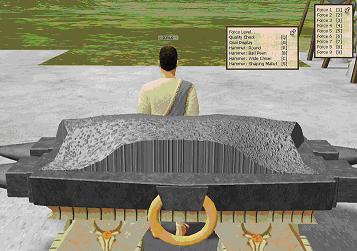
Now we repeat the same steps (using the "G" key, with the mouse over the blank) to observe our Goal (what we need to accomplish) from the back. Notice that, when looking at the back, a lot of metal needs to be moved from the sides to the middle. Notice especially how much higher the middle is in the Goal view than it is in the blank. Try pressing "G" several times to see the difference.
|
|
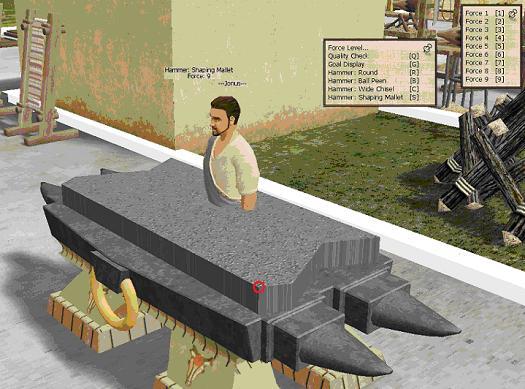
Now that we have a good idea of what we need to accomplish, we are ready to start. Select the Shaping Mallet tool and then select Force: 9. Notice that when you do this, your project flips back out of "Goal" view to the working view.
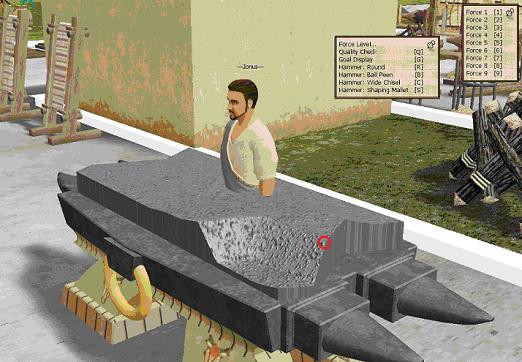
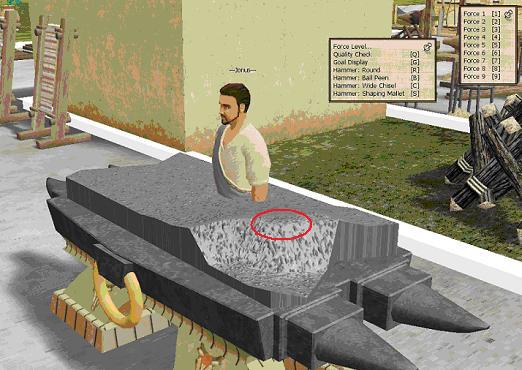
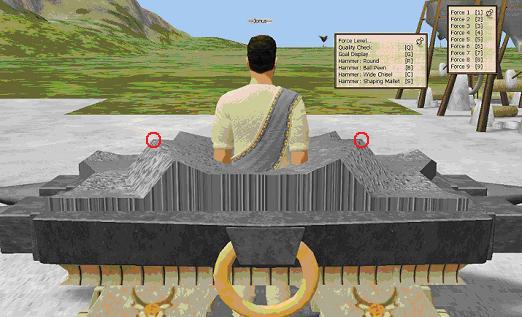
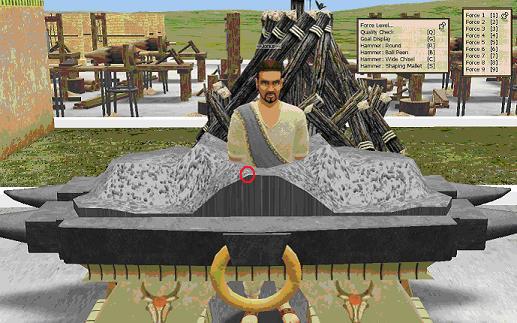
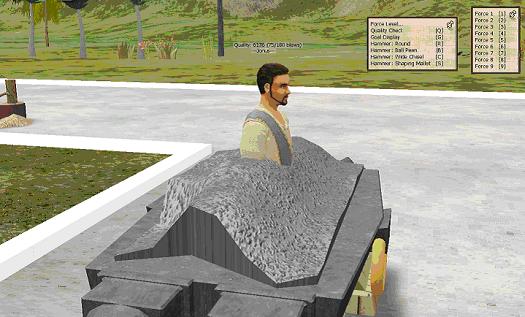
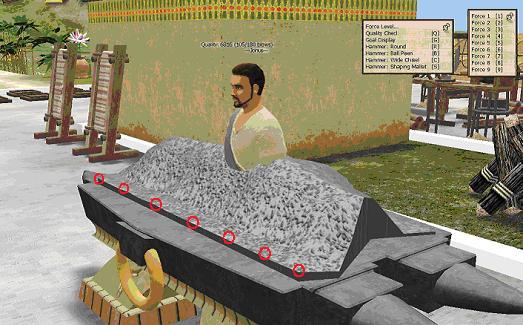
From having viewed the blank and the goal at all angles, we know that we need to move a lot of metal into the middle from the sides and a lot of metal from the front to the back. To do this, we are going to use the Shaping Mallet at full force to push metal into the middle from the sides and the front. Let's start at the sides. Position your mouse over the front corner of your blank, on top of the blank, but right at the corner, and click once. You should see a depression form like this:
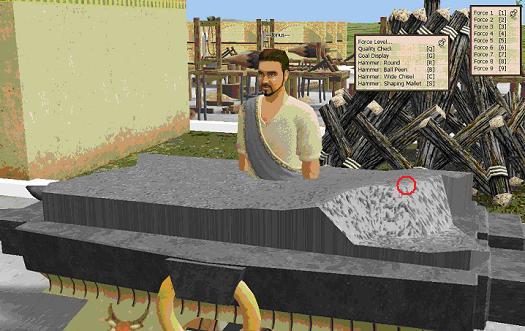
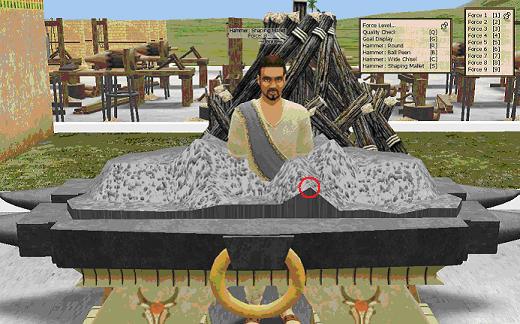
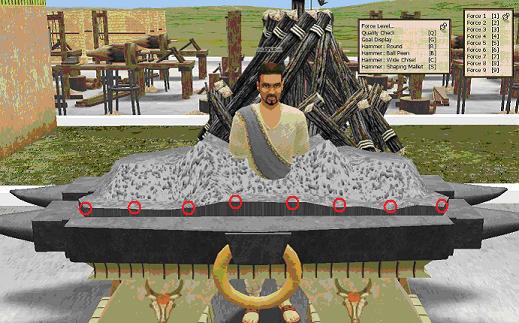
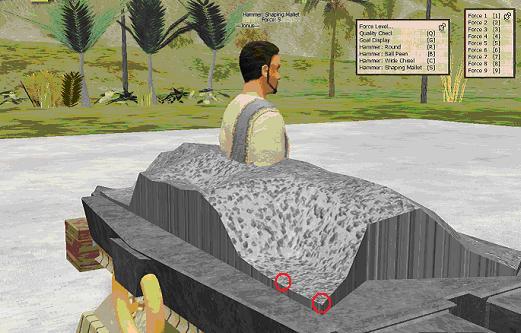
We are going to be making two hits all along the side of the blank, so position your mouse at the top corner that the previous depression made along the front of the hatchet blank and tap it once more (click your mouse once). The tool selection and force level remain the same until we change them, so we are still hitting with the Shaping Mallet at Force: 9. You should have a wider depression at the front of your hatchet blank, like this:
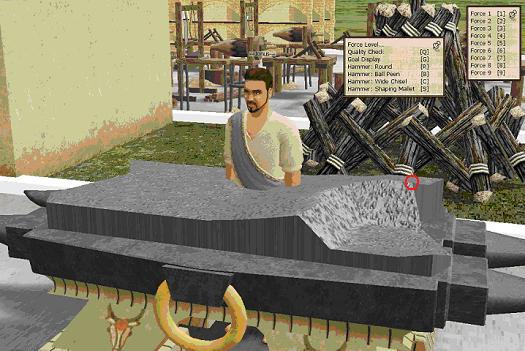
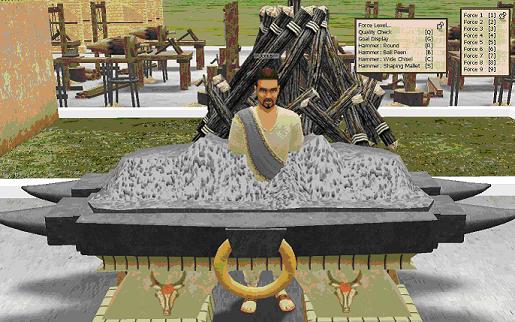
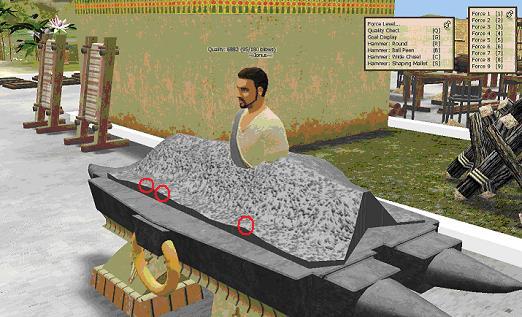
Now we are going to move one "row" back and repeat these two blows. Position your mouse pointer where the depression has made a peaked angle along the side, with the mouse pointer on the top of the hatchet blank, right at the angle along the side (hitting the side of the blank does nothing). Click once to start the second row of hits and you should be left with something like this:
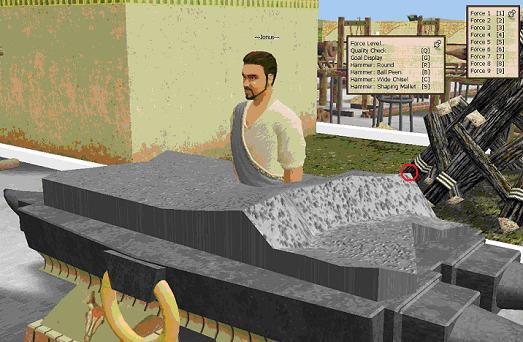
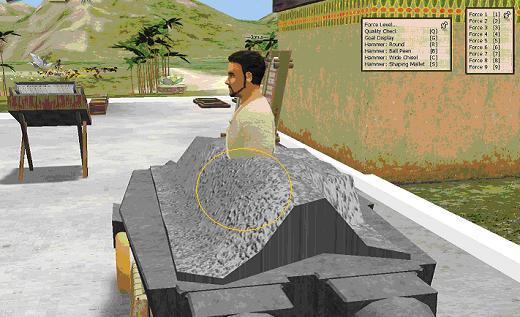
Now, the position of second hit in the second row is a little harder to see so I have changed the angle of view a little. This is something you should get used to while working: shifting your view or angle of view to better see where you need to hit next.
Notice that between the first row of indentations and the second row, there is a small bulge on top, facing the camera. Position your mouse over that bulge and click once to complete the second row. You should be left with something like the image below:
The point to hit along the outer edge to start the third row, is pretty obvious now. However, unlike the first and second rows, we will only make one hit on the third row for now. Position your mouse, make the hit, and you should see something like this:
Now we begin the fourth and final row at the back edge of the hatchet blank. For the first hit, position your mouse at the back corner of the blank, where previous hits have created a sharp edge, and hit once, leaving you something like this:
The second hit on the fourth row is equally obvious, but this time lies along the back edge of the hatchet blank where the previous hit leaves a sharp angled edge. Make the hit and, if you move your camera view to look from the back, you will see something like this:
That's the basic set of hits that you need to move metal in from the sides to the middle. Repeat that set of hits on the other side of the hatchet blank and you will see something like the following when viewing it from the back:
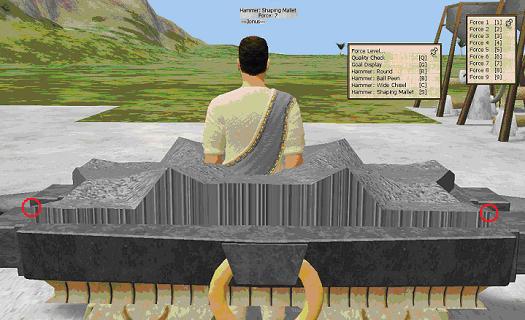
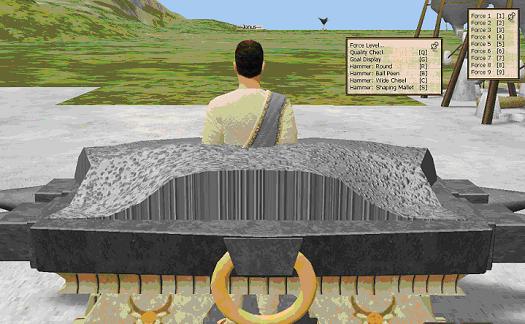
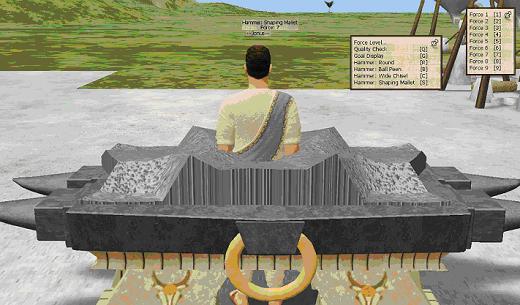
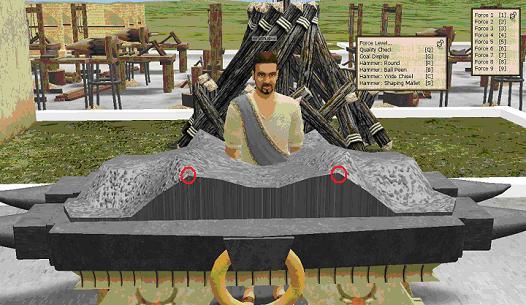
Now, notice that there are a couple peaks in the middle of the hatchet blank where we might have hit the second blow on the third row. We are going to take out those peaks now, but with a little less force. Choose the Shaping Mallet again, but this time choose Force: 7 and then click once on each of those peaks, leaving you with something like the following:
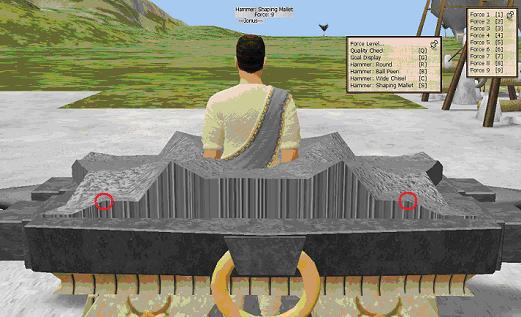
We still have some obvious peaks, but we are also still in the gross shaping phase of the project and metal will continue to move around quite a bit before we are done, so don't worry about the high peaks and low valleys at this point. Let's shape the back corners a bit as long as we are looking at the project from that angle. Choose the Shaping Mallet and Force: 9 again and, positioning your mouse right at each back corner, click once to produce the following:
Now, let's look at this in "Goal" view again to see how close we are getting.
You can see that we have raised the height of the metal in the back quite a bit, even though there are some rough angles, peaks, and valleys. Not to worry, though, because those will get smoothed out later. Although we have moved a lot of metal in from the sides, it is still not quite enough, so let's make another set of hits at the back, this time at Force: 7 and one step in along the back edge, hitting where the previous blows created an angled step along the back edge. One hit on each side, right at the back edge, produces something like the following:
Now, let's swivel the cameral round to take another look at the front. Using the Goal view you will notice that the front edge is supposed to be flat and very thin, sloping back towards the middle of the hatchet. This will be the cutting edge of the hatchet, even though it doesn't look much like that now. So, what we need to do is flatten the front edge. As we do this, we will also be moving more metal from the front to the middle and back of the hatchet.
Select the Shaping Mallet and Force: 9 and, beginning at the outer edges, start clicking right along the edge, working from both outside edges towards the middle, like this:
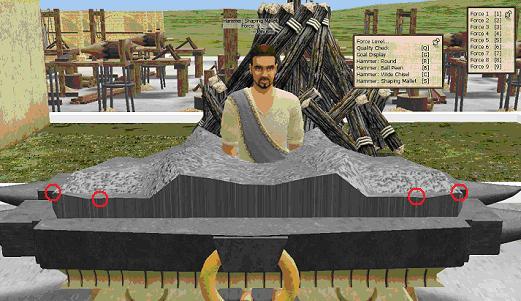
We want to continue to flatten the front edge completely, but we have a tiny complication here, since the normal "step" edge one further step inwards (for the third blow from the outer corner) has become two large peaks, each two steps inwards from the outer edges (or in the fourth blow position). No problem. Hit each peak once with the Shaping mallet. We are left with one high peak near the middle.
Hit it once at one edge of the peak, and the next spot to hit becomes obvious.
We have made one sweep across the front and moved a lot of metal, but we still don't have the front completely flat, so repeat the process, starting at the outer edges, inwards towards the middle, using the Shaping Mallet at Force: 9.
When you are done it should look very similar to the following picture:
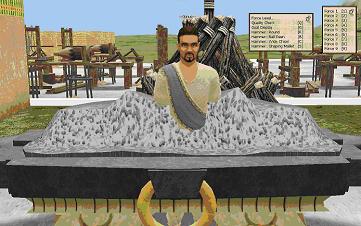
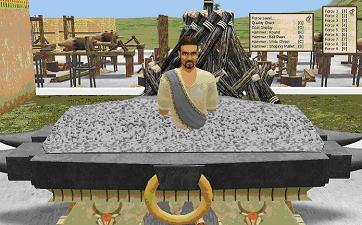
Notice that the sides of the hatchet (to either side of the central bulge) are much higher now too. It might have looked earlier like we had flattened the sides too much, but that was before we moved metal from the front to the middle and back (by flattening the front edge as you have just done). Now, the front edge is still not perfect and neither is the central bulge in the middle of the hatchet, where we have some high peaks. Let's take a minute to look at the "Goal" view again.
|
|
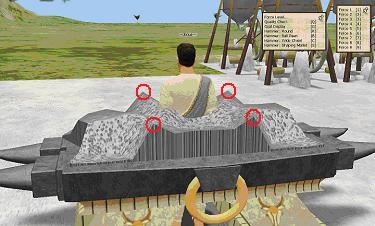
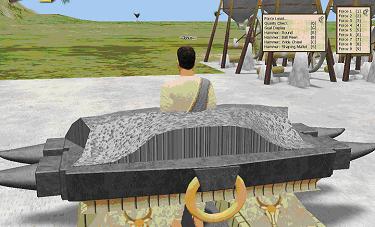
And now, let's do the same thing from the back, just to get an idea of where we are and how close we are to the ideal. It seems clear that we have a lot of imperfections to hammer down, when we look at the current state of our blank hatchet. It is also clear that it is not entirely the same from one side to the other, but that is okay. Tiny differences in where we placed our hammer on each side have resulted in a few, fairly minor bulges here and there.
|
|
The most important thing to notice is that we have moved nearly enough metal to the back and especially to the middle of the back. If it is still off a little bit, we will continue to correct that as we polish and finish off the hatchet. So, let's take care of those big peaks on top of the hatchet first. Select the Ball Peen hammer and Force: 5 and hit each of those peaks once (there are four major peaks). You should be left with something like this:
Now, step out of the middle of your project. Using the "G" or "Goal" view and your Ball Peen Hammer at force 4 or 3, knock down any high points that you can see sticking up on the top and middle of the hatchet. Don't do much at this point, just smooth it over a bit, using maybe 5-8 blows total.
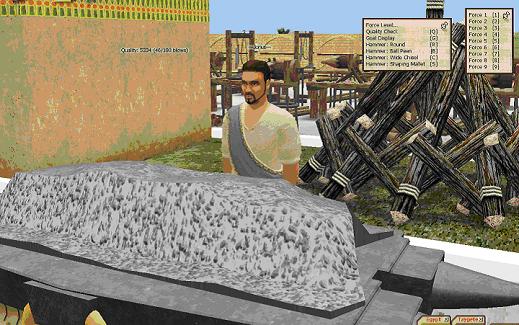
You can see that, although it is still a bit rough, it is really starting to look like a hatchet now and, most importantly, most of the mass of the metal is roughly where it is supposed to be. So, how close are we really getting? Time to use the "Quality Check" option on the Tools menu. Simply place your mouse over the hatchet anywhere and press "Q" to check the quality level as it stands now.
With relatively few blows, we have roughed out a 5k hatchet, In fact we have used just 46 out of 180 allowed hits, which means we have a lot of leeway left to finish and polish the piece.
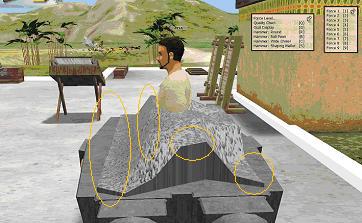
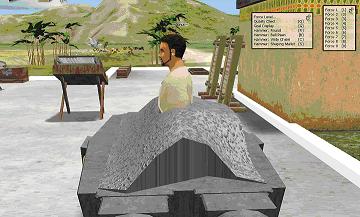
So let's look at where our hatchet deviates most from the ideal. Taking a side view this time, use the "G" key to check the "Goal" view. Notice that our hatchet has a sharp, high ridge in front, where the ideal hatchet has a smooth slope. The ideal hatchet also is highest right in the middle and slopes down to the front and back from that point (so some work is needed both in front and in back). It also has sharp edges along the front and at the two back corners.
|
|
The best way to knock down that sharp ridge along the front face is with a hammer with a rounded or sloped bottom like the Ball Peen, set to Force: 5 to start with. Proceed working from the outer edge towards the middle, flipping frequently to and from "Goal" view to check where the next hit should be made. If you notice a smaller bulge, you might want to switch to Force 4 or 3, but don't do too much detailed polishing at this stage. In the following picture, notice that the nearer half has been rounded off already as just described.
Repeat this process along the other front face and you will see something like the following:
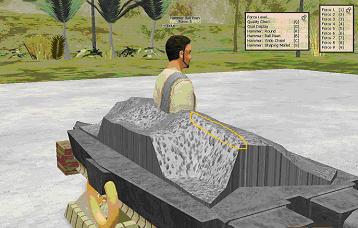
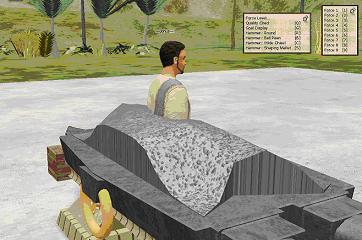
Now, let's compare the back against the "Goal" view to determine where the most glaring differences are. You can see in the Goal view (below) that the highest point at the sides should be right in the middle of the side, but isn't that way in our hatchet. You may also notice that the back is rounded off in the Goal view, unlike ours. Finally, there may be a few bulges in the middle on top that need to be knocked down a bit.
|
|
So, starting with the Ball Peen hammer at Force level 5 to 3, work from the outer edge, just back of the middle of the hatchet where the indent is and knock down that ridge so it is lower than the ridge in the middle of the hatchet. Use the "Goal" view frequently to judge where to hit and what force level to use. You will get better at this with practice. Continue to knock down any significant bulges in the middle of the hatchet and to round off the edges at the back of the hatchet.
Finally, using the Shaping Mallet again at Force: 9, flatten out the back corners again, hitting once at the very outer corner, and once, one "step" further in along the back edge. Repeat this process on the other side of the hatchet and you should have something like the following image. Check the Quality again by pressing "Q" to see how far you've come.
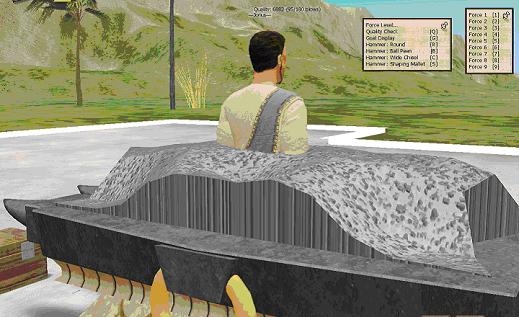
At this point with my project, the Quality was 6882, with 95 out of 180 blows (just over half) used up. That's encouraging because it means we have a lot of hits left to polish and perfect the piece. So now let's look at the front and see what needs to be done there.
Notice that the front edge is quite uneven. Various hits along the front face higher up have moved some metal back down to the front edge. Metal is getting shifted around all the time. Luckily, we have plenty of hammer blows left to clean this up and make it better. It is amazing that we are at nearly 7k quality as it is, considering what the cutting edge looks like now.
So, let's work on that front edge, using the Shaping Mallet at Force:4 for the higher spots and Force: 3 or 2 for the smaller bumps. Pay attention not just to the front edge itself but to the slope just behind that edge. You want to make both fairly flat. Take a look at the "Goal" view from time to time so you can see how it slopes up. You don't want to flatten it much more than that. You should be able to flatten it out with 10-11 hits so it resembles the following:
Now, using the Ball Peen hammer at Force: 4, work inwards from both sides at the the outer corners, hitting at the very edge of the front, to flatten the edge, leaving a little slope towards the back of the hatchet. You should see something like the following:
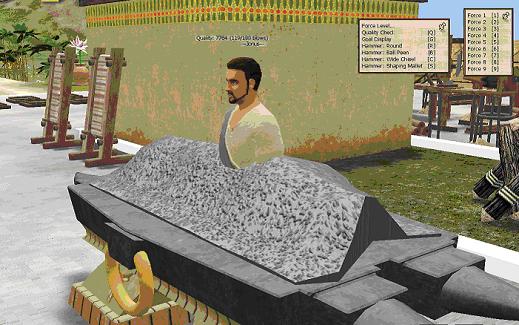
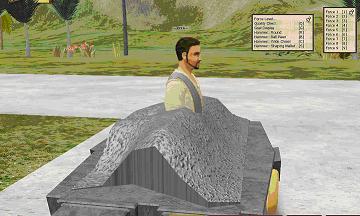
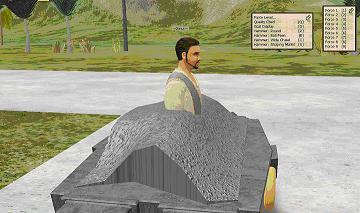
At this point the Quality has jumped to 7764 and I have used 119 out of 180 blows, so we are in good shape to finish and polish the hatchet further. Let's take another look at the Goal vs. what we have achieved. We notice that they look very similar but that there are small bumps and irregularities here and there, especially on the front face and on top.
|
|
Now we have to be very careful to use minimal force to smooth things out. Using the Ball Peen hammer and Force: 3 to 1, depending on the size of the bulge, flip between the "Goal" view and the normal view and knock down any bumps you see on the front face and top, moving your camera around to get a better view as needed.
I also want to work on the two front corners, which need to be flattened towards the back. Using the Round Hammer at Force: 5 (and Force: 4 on the other side... you will have to judge this) I hit the front right corner about 1/3 of the distance along the edge towards that sharp corner on the side. That flattens it out. Now I used the Shaping Mallet and Ball Peen hammer again at about Force: 3 or less along the front to fix that edge again.
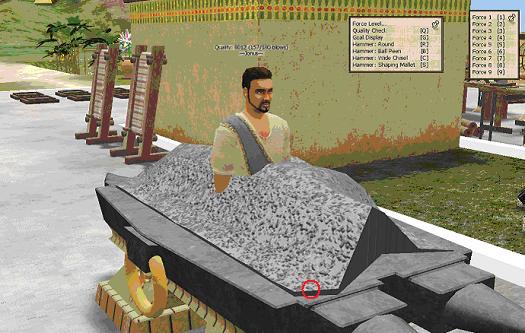
When I have finished with smoothing out the most obvious bumps and bulges, the Quality has risen to 8012 with 157 out of 180 blows used up... leaving just 23 hits to finish up. Moving my character out of the center of the piece, I take a look at the middle-top of the piece and smooth out any bumps there, and then check the Quality again.
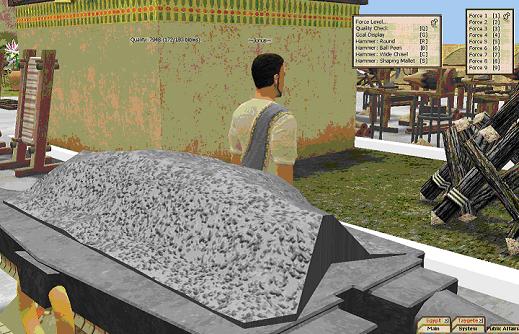
Notice that the Quality has dropped a little to 7948 with 172 of 180 blows used up. This can happen because some details count more towards the overall quality than others. The front edge and the four corners of the hatchet seem to matter much more and it might have been better if I had spent my final efforts there. As it is, I have 9 blows left to clean up any distortions in the front edge that my recent smoothing on the front and top have left.
I finish up at a Quality of 8029 with 180 of 180 blows used. Keep in mind that I used Iron for this example. You can get more blows to work with if you use higher grades of metal... so it is up to you how much effort you want to put into getting expensive alloys so you have more blows to work with on the anvil.
The last step is to click on the anvil to bring up the main anvil menu and then select Complete Project to finish your piece. You will need 1 piece of wood in your inventory to use as handle to complete the hatchet.
Keep practicing if you don't get the results you wanted at first. You can always scrap the project if you make a mistake and you will get all of your metal back to work with again. Each attempt teaches you something.
The most important part of making any of these projects is getting most of the metal moved around with brute force (and relatively few hits) at the start, leaving you with most of your available hits to polish and perfect the piece. Use this principle and you will find you can make decent Shovels (or whatever) without much additional practice.
